This page is devoted to information specific to the OS X build of OpenCV. Things are changing quickly due to recent work by Willow Garage, and the transition to the CMake build system.
- Also see the general InstallGuide.
- For instructions on using the OpenCV libraries in an OS X app see UsingOpenCVUnderOSX
There are a number of ways to install OpenCV on OS X. The most straightforward way is to download the latest version of OpenCV (currently 2.2.0), and use cmake as described in the general InstallGuide and below at number 2.
Each of the numbers below are separate ways to install OpenCV for Mac OS X.
0. Getting a precompiled version ( sorry, but this is only for OpenCV 1.2 and only valid only for i386, Not 2.x – anyone know how to build a Private Framework for 2.x ? ):
see: http://www.ient.rwth-aachen.de/cms/software/opencv/
wget http://www.ient.rwth-aachen.de/~asbach/OpenCV-Private-Framework-1.2.dmg
open OpenCV-Private-Framework-1.2.dmg
cd /Volumes/OpenCV\ Private\ Framework/
cp -R OpenCV.framework/ /Library/Frameworks/OpenCV.framework
1. Build via MacPorts
For Snow Leopard users, you can build OpenCV 2.1.0 and above via MacPorts as a 64-bit library with support of QTKit video I/O and Cocoa GUI.
Assuming MacPorts installed, first use:
sudo port selfupdate
to update the MacPorts base and the port tree. Then, simply:
sudo port install opencv
to build OpenCV 2.1.0 in 64-bit.
If you encounter errors, try installing its dependents with +universal whenever possible.
sudo port -v install opencv +python26
to use with Python 2.6 bindings or
sudo port -v install opencv +python27
to use with Python 2.7 bindings
By default OpenCV is installed to /opt/local/ according to MacPorts conventions. The opencv_xxxx utilities are located in /opt/local/bin/, the dynamic libraries in /opt/local/lib/ and the header files in/opt/local/include/opencv/.
To use the libraries, include the required files with standard includes. For example:
#include#include
If you use Xcode, the instructions are similar to the ones in method 3. It only differs that /usr/local becomes /opt/local.
1.1 Build via HomeBrew
For users that have and like homebrew:
sudo brew update
sudo brew install opencv
If you need the 32bit version, change the last command to sudo brew install opencv --build32
OLD METHOD:
Assuming HomeBrew ( aka ‘brew’) is installed first:
sudo brew update
sudo brew install lame       ( for libmp3lame that opencv needs)
sudo brew install libpng     ( which theora needs -  part of the ffmpeg package )
sudo brew link    libpng     ( needed if theora/ffmpeg can't find it)
sudo brew install ffmpeg     ( for libavcodec and related stuff that opencv needs)
sudo brew install python     ( the system python is not good enough)
sudo brew install doxygen    ( if you compile opencv yourself, you'll want this)
sudo chmod 000 /System/Library/Frameworks/Python.framework/
sudo chmod 000 /Library/Frameworks/Python.framework/
   ( disable system python/s temporarily just for the next step)

either:
sudo brew install opencv     ( finally! - this will probably bork? )

or:
svn co https://code.ros.org/svn/opencv/trunk/opencv cd opencv ( or get sources by hand)
cd opencv
ccmake .   ( disable everything you can that's not important, maybe you'll figure out how get it to build? don't forget to press 't' for advanced mode.  Edit the settings as you desire, then 'c' and 'g' )
cmake .
make -j8
make install ( optional )

sudo chmod 755 /System/Library/Frameworks/Python.framework/
sudo chmod 755 /Library/Frameworks/Python.framework/
   ( put it back how it was )
By default OpenCV is installed to /opt/homebrew/
* see also:
http://www.tsd.net.au/blog/opencv-python-bindings-macports
http://wiki.nuigroup.com/Installing_OpenCV_on_Mac_OS_X
https://github.com/mxcl/homebrew/issues/issue/1792
See MacPort install for any other details, just replace /opt/local with /opt/homebrew
2. Build from source using the CMake build system (new)
The GNU autotools methods (configure, make, make install) are being obsoleted. OpenCV has now switched to the CMake build system.
Getting the source code
Make sure you have subversion installed (built-in since Snow Leopard). If MacPorts is your primary package manager, use:
sudo port install subversion
if not using MacPorts or it gives an error, try:
sudo fink install svn-ssl
Make sure you have cmake installed. This can also be installed with MacPorts:
sudo port install cmake
Check out the source code into a clean directory and cd into the source directory after the download is complete:
# previous URL
# svn co https://code.ros.org/svn/opencv/trunk/opencv ; cd opencv
# current (April 2012) URL
svn co http://code.opencv.org/svn/opencv/trunk/opencv ; cd opencv
- Note: There’s a “atomic bomb commit” at r3060 which largely changed the OpenCV directory structure. If you wish to work with the older structure, you can specify an earlier checkout revision:
# previous URL
# svn co https://code.ros.org/svn/opencv/trunk/opencv -r 3059 ; cd opencv
# current (April 2012) URL
svn co http://code.opencv.org/svn/opencv/trunk/opencv -r 3059 ; cd opencv
Use CMake to build
To use CMake to generate Unix Makefiles, type:
# make a separate directory for building
mkdir build
cd build
cmake -G "Unix Makefiles" ..
You can specify many configuration options in the above command. For examples:
- -D BUILD_TESTS=OFF -> if you don’t want to build tests.
- -D BUILD_NEW_PYTHON_SUPPORT=OFF -> if you don’t want the Python interface support.
- -D WITH_CARBON=ON -> (mainly for Leopard and below) if you want to use Carbon for UI instead of Cocoa (since r2909).
- -D WITH_QUICKTIME=ON -> (mainly for Leopard and below) if you want to use QuickTime for Video I/O insted of QTKit (since r2924). If you’re using Snow Leopard and do need Carbon and QuickTime, you must also specify -D CMAKE_OSX_ARCHITECTURES=i386, -D CMAKE_C_FLAGS=-m32 and -D CMAKE_CXX_FLAGS=-m32.
- An example configuration of OpenCV 2.2.0 on Mac OSX 10.6 without TPP or Eigen or Carbon is shown at http://imagebin.ca/view/A2uboY.html.
Finally, follow the usual “make, make install” method:
make -j8
sudo make install

append a new line "export PYTHONPATH=/usr/local/lib/python2.7/site-packages/" to ~/.profile:
If you need the CMake GUI for other options, replace cmake with ccmake. If the arrow keys fail, you can use the following commands instead:
ctrl + N : next option
ctrl + P : previous options
ctrl + D : down one page
ctrl + U : up one page
To compile with Intel Threading Building blocks, use ccmake (the Cmake GUI) to specify the lib and include paths to your installation of TBB.
After setting the build options, hit ‘c’ to configure. Hit ‘g’ to generate the config file and exit ccmake. Then execute the “make, make install” commands above.
if got “Segmentation fault” during “import cv”:
In ccmake(ccmake -G "Unix Makefiles" .), toggle to the advanced mode pressing t.
change PYTHON_LIBRARY value to
/opt/local/lib/libpython2.7.dylib
and PYTHON_INCLUDE_DIR to
/opt/local/Library/Frameworks/Python.framework/Versions/2.7/include/python2.7
Note that the specific path depends, of course, what version of Python you are using (2.6 or 2.7 etc.). Also, if you are using the system Python, instead of MacPorts (which is in /opt), then you probably want PYTHON_LIBRARY to be /usr/lib/libpython2.7.dylib
3. Building as an Xcode Framework using the make_frameworks.sh script (obsoleted)
Note: the CMake build system should ultimately make this obsolete, one may remove this section when the CMake building is mature on the Mac. By the way, the make_framework.sh script has been removed since revision 2528.The last revision where make_framework.sh successfully builds, as I tested, is r2492.
OpenCV can now be built as a Mac OS X Framework useable with XCode. Just invoke the ‘./make_frameworks.sh’ script and you will obtain a Universal Framework named “OpenCV.framework” meant as a Private Framework.
Additionally, a pre-built version (universal binary Private Framework, again together with a demo application) is available. See the PrivateFramework wiki page or directly download it from http://www.ient.rwth-aachen.de/~asbach/OpenCV-Private-Framework-1.1.dmg .
A more recent version of the framework can be found here http://www.ient.rwth-aachen.de/cms/software/opencv/ or downloaded directly from http://www.ient.rwth-aachen.de/~asbach/OpenCV-Private-Framework-1.2.dmg
OpenCV 2.0 Universal Framework (tested on ppc and i386 Leopard and Snow Leopard): Here is an universal Framework for Mac ppc/i386 built from the OpenCV 2.0 released in September09. By the way, I also fixed some bugs and add some improvements:
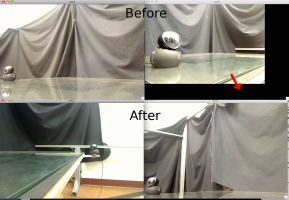
-> a bug on Mac (carbon) that prevented cvCloseWindow/cvCloseAllWindow from working. -> a bug when 2 cameras capture images simultaneously (black bands) (see picture bellow) -> The trackbar now displays its current value (see picture bellow) and is resized according to its name.
Those fix/improvements are added to this framework.


4. Building the old UNIX way
This was removed since it no longer works.
Other Resources
Links:
- Creating a universal static OpenCV library with iPhone support
- http://www.ient.rwth-aachen.de/~asbach/OpenCV-Private-Framework-1.1.dmg
- KirstenJones – March 2, 2009 – Has notes on building OpenCV using CMake on her blog at http://www.princesspolymath.com
- http://www.opencv.org.cn/forum/viewtopic.php?f=1&t=7524&start=0%20Tutorial of method 3 in Chinese, although it suggests a pre-built Framework instead of building by yourself.
- Compile OpenCV projects using shell scripts on MacOSX
Attachments:
Collected Information
Compiling Universal Binaries
The --enable-universal-build switch has been removed again since it doesn’t allow building on intel machines … You can still try out what it did by configuring with:
./configure CFLAGS="-arch i386 -arch ppc" CXXFLAGS="-arch i386 -arch ppc" --disable-dependency-tracking
As an alternative, we now have a small build script that configures and builds twice (once for ppc, once for intel) and then merges the binaries with lipo. We can and will extend this to more architectures whenever Mac OS X 10.5 Leopard is released, since it finally comes with 64bit compilers for intel. In addition to those then natural 4 platforms (intel/ppc * 32/64), it might be nice to provide specially optimized variants for G5, G4, G3 (-mcpu=…) to maximize speed on older hardware. This however requires additional testing (and performance testing).
See also: Compiling for Multiple Architectures in http://developer.apple.com/documentation/Porting/Conceptual/PortingUnix/
A (very old) list of supported quicktime codecs can be found at QuickTimeCodecs

